Table of Contents
Do not index
Ever wished you could generate fresh, engaging videos daily without lifting a finger? With Revid AI, it’s possible! Revid AI allows you to automate your video creation process by creating "workers" that automatically produce one video per day.
In this tutorial, we are going to create a worker that turns X (twitter) content into videos—automatically producing one video per day. Follow the steps below.
Free AI Video Tools
Automate your daily video creation and keep your content flowing:
- Tweet/X to Video: Turn your tweets into engaging daily videos effortlessly, keeping your audience connected.
- AI Movie Maker: Create professional, automated videos with minimal effort and showcase fresh content every day.
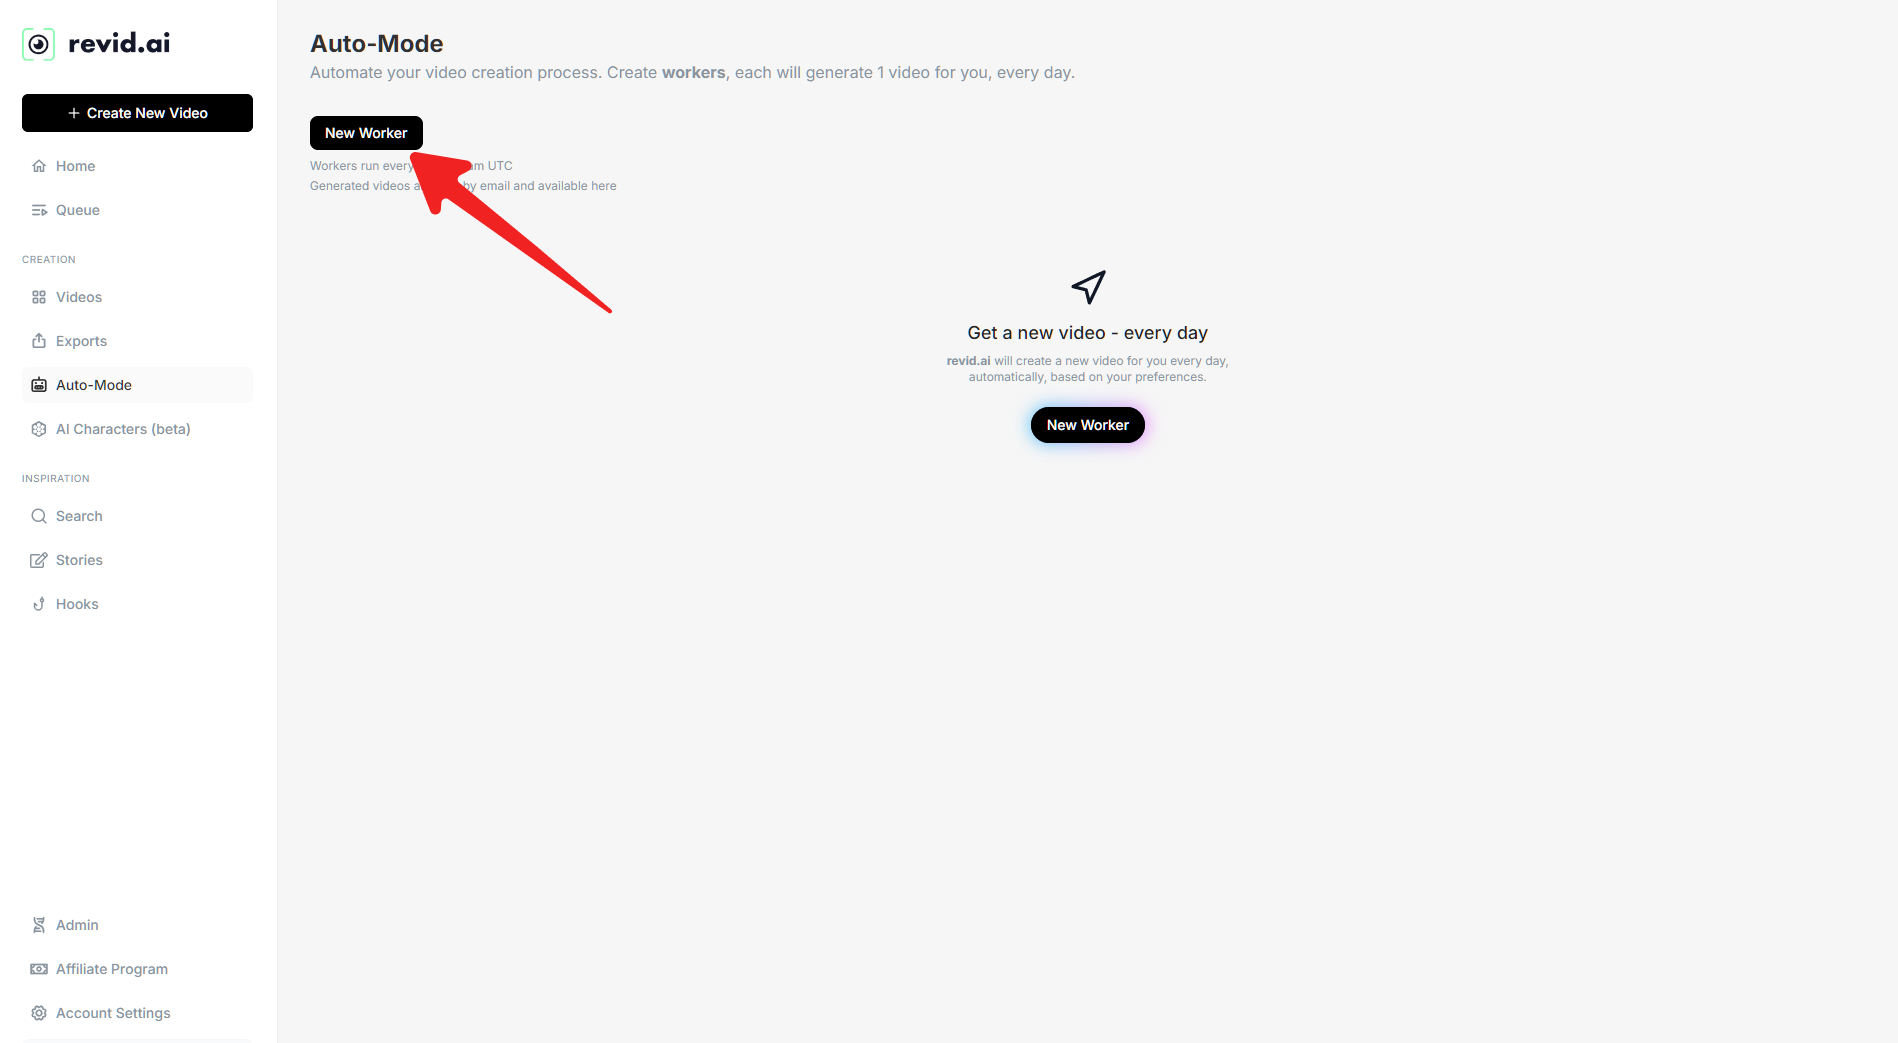
Step 1: Go to Revi Automations
Click on New Worker when the page opens.
Step 2: Configure Your Worker in Revid AI
Once you start creating a worker in Revid AI, a modal window will open where you can input the details for the worker you want to create. Follow these steps to configure it:
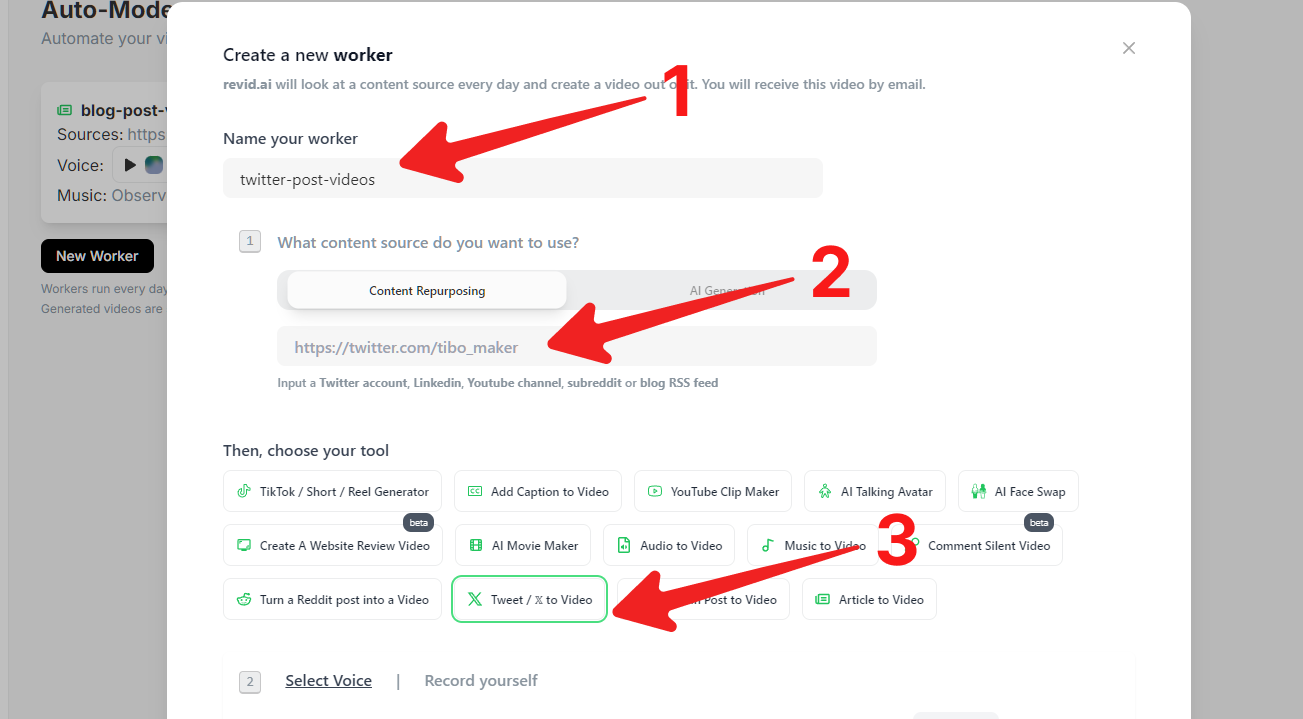
1. Name Your Worker
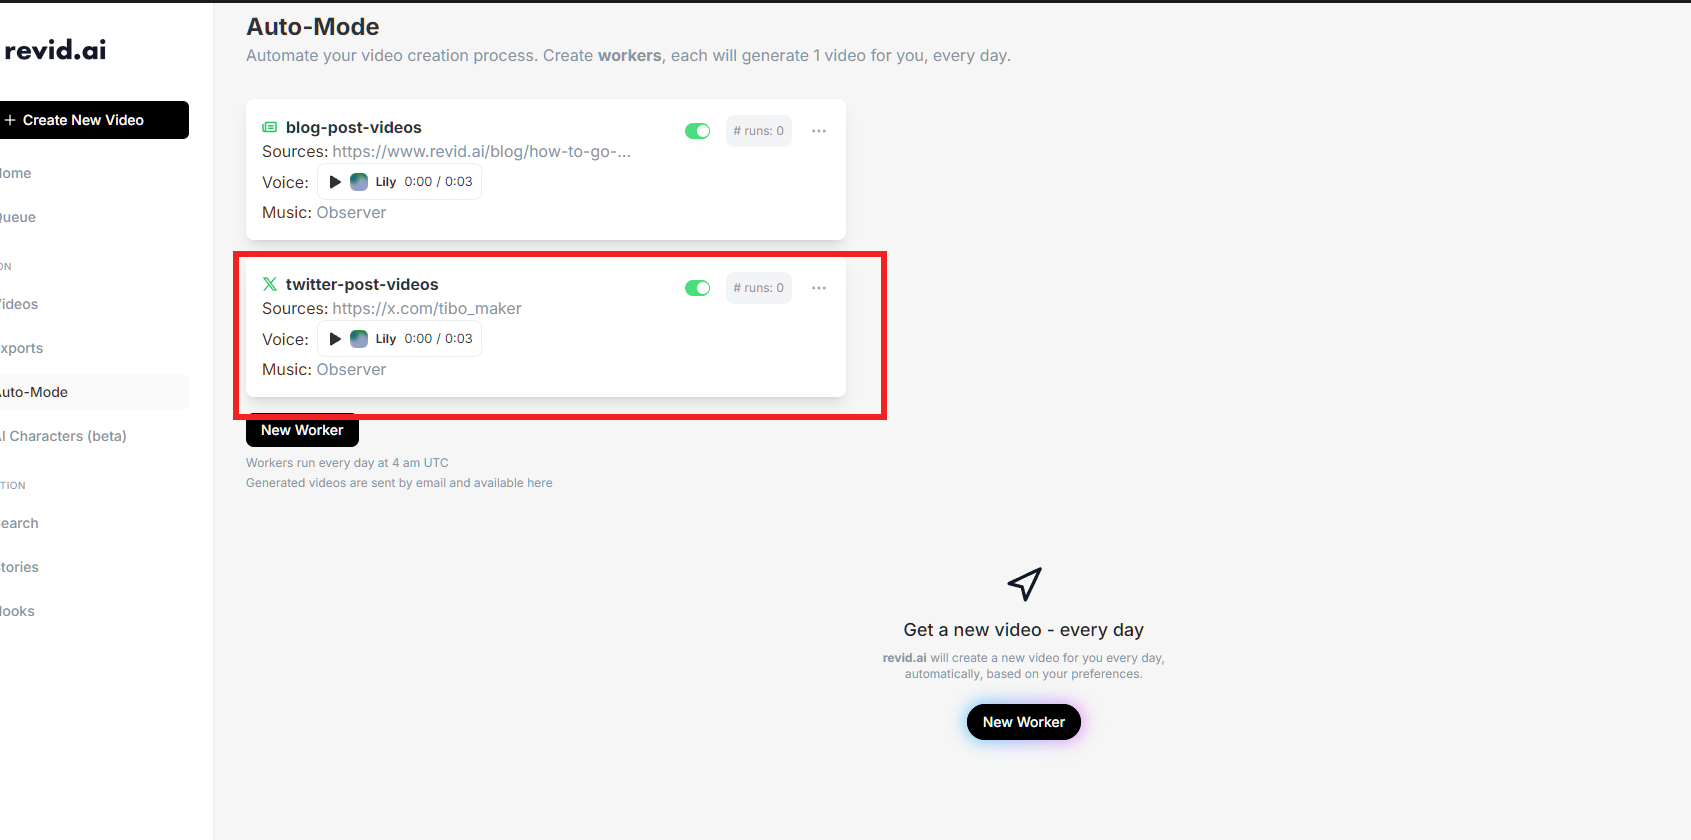
In the first input field, give your worker a name. You can choose any name, but in this example, I’ll name it twitter-post-videos to represent that it will generate videos from twitter post.
2. Select Content Source
Make sure Content Repurposing is selected as the content source. Then, enter the link to the twitter post. For example, I used the link to tibo’s account https://x.com/tibo_maker
3. Choose the Tool
For the tool selection, ATweets / X to Videos, as we are generating videos from an X (twitter) post.
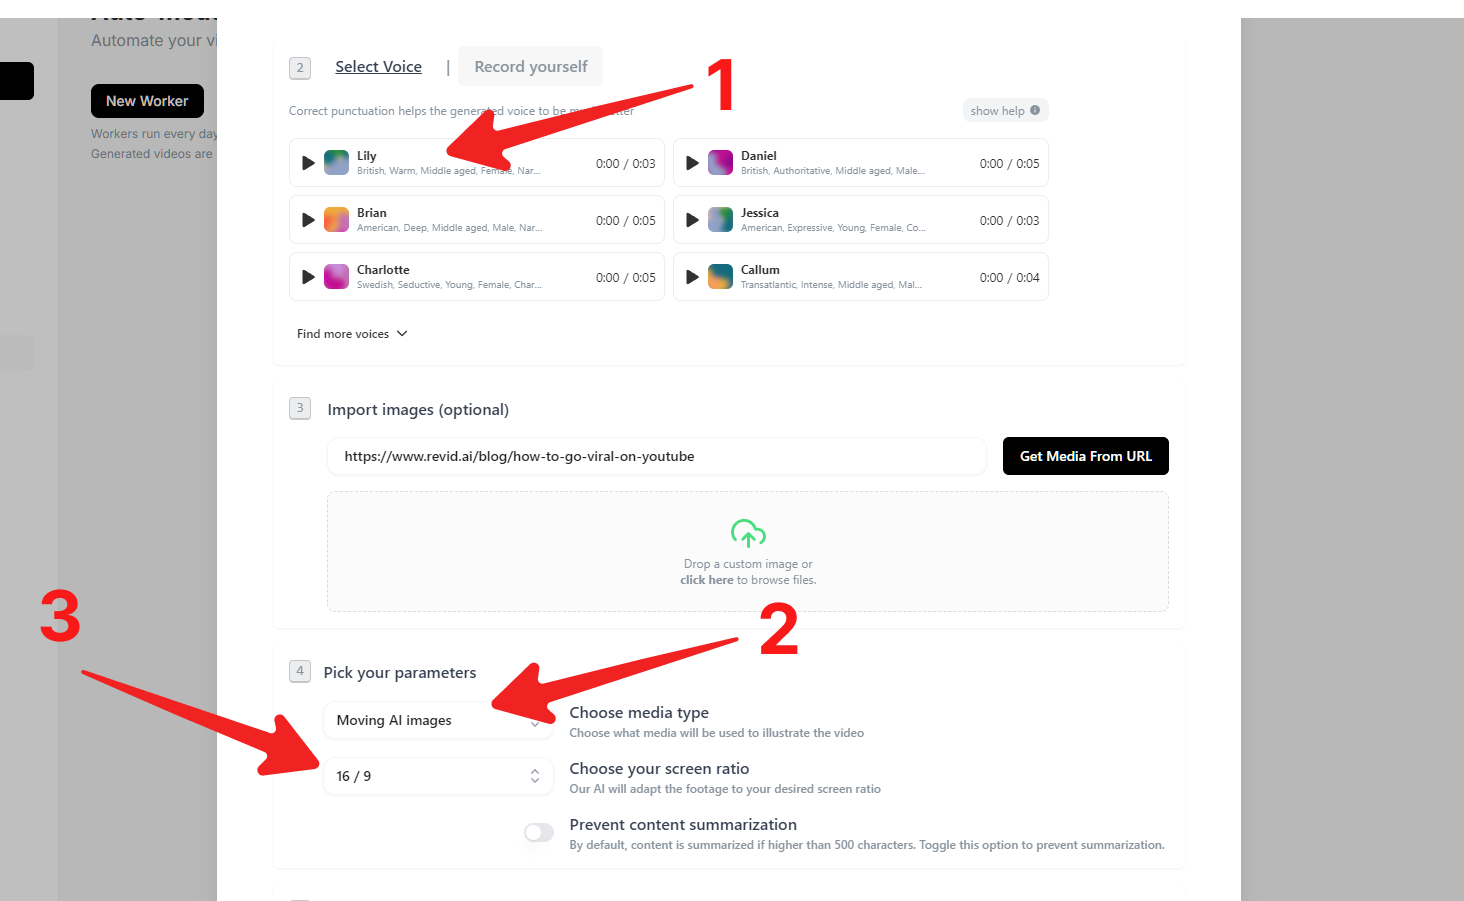
4. Select a Voice
Next, select a voice for the narration of the article. In this example, I chose the Lily voice for a clear and professional sound.
5. Choose Media Type and Screen Ratio
In this step, you’ll select the media type and screen ratio for your video:
- Media Type: I selected Moving AI Images, but you can also choose from options like Stock Videos or other AI-generated Videos, depending on what suits your content best.
- Screen Ratio: I chose the 16:9 ratio for a desktop or landscape view. If you are creating a video for mobile platforms like TikTok, you can opt for the 9:16 ratio.
6. Content Summarization (Optional)
If you want the article to be summarized before generating the video, toggle the Summarize Content option. This is useful for longer articles where a condensed version might perform better.
7. Generation Preset
The generation preset allows you to select a style for your video. You can leave this as the default or pick one that matches your content style. I chose the Realist preset to give the video a more realistic tone.
.png?id=a16e8ce3-3dda-4dcc-85ac-6c740b2329ce)
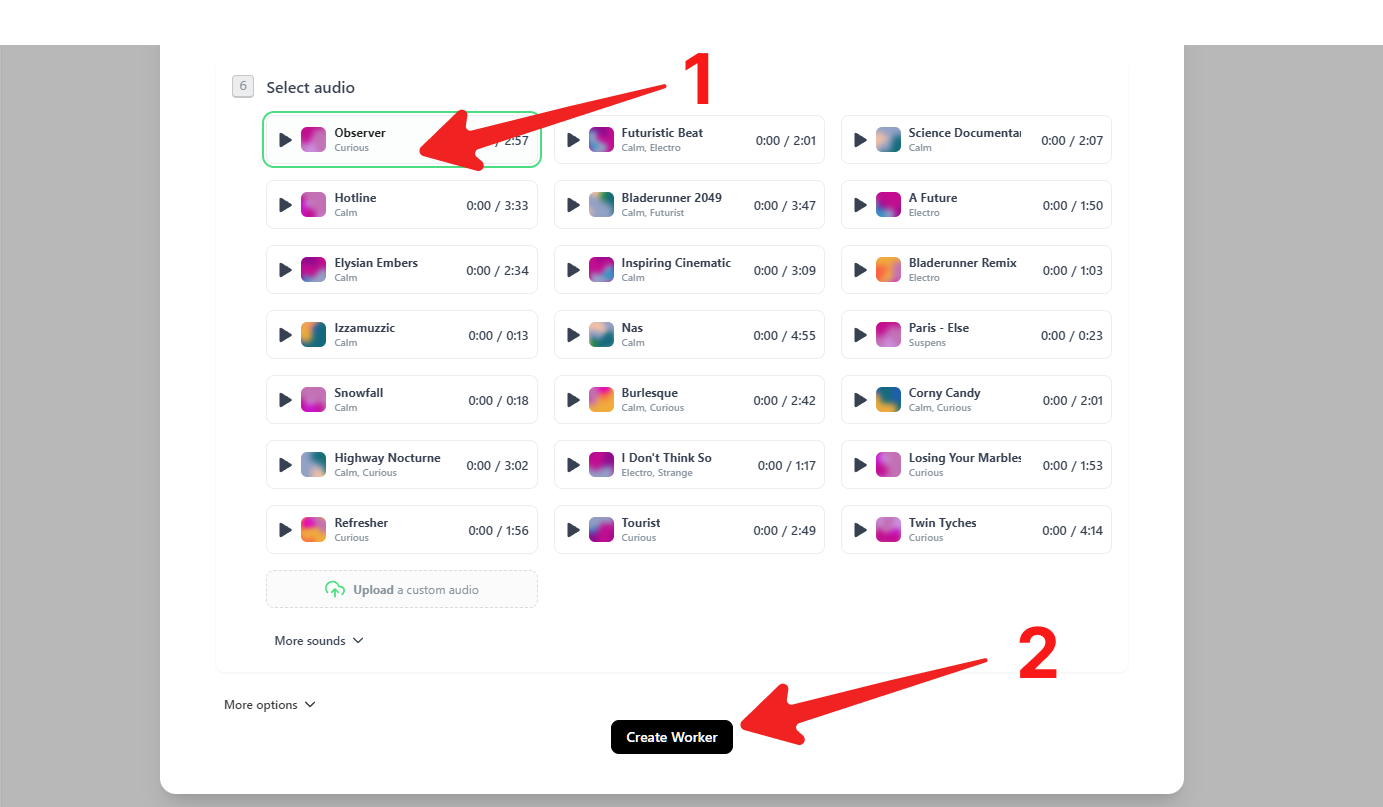
9. Background Audio
Finally, choose background music. I kept the default selection, but you can browse and pick one that fits the mood or theme of your video.
10. Create the Worker
Once you’ve finished configuring all the settings, click on Create Worker. Your worker is now ready to automatically generate videos from your twitter content daily!
And that’s it. Your worker should be created now as seen in the screenshot below, and will run everyday at 4am UTC
Go on and try creating workers for any other kind of videos you need.