How to Add Background Music to a Video: Mix It Right
Learn how to add background music to a video in any editor, set levels so speech stays clear, and clear the rights before you publish.
On this page
You've cut the video, the voiceover sounds clean, and then you drag in a music track that seemed perfect in the library preview. Within ten seconds it's either drowning your first sentence or sitting so low you can't hear why you added it at all. That's the normal starting point for learning how to add background music to a video well. The fix isn't a magic level or a trending song. It's a short sequence of decisions about fit, speech clarity, and rights, in that order, before you touch the export button.
- Probability of sharing when the music fit the video, up from 9.1% when it did not
- 58.7%
- Study of viral video ads
- Difference in sharing likelihood between fitting and non-fitting music
- 6.45x
- Study of viral video ads
- Suggested starting gap between music and voice under speech
- 15 dB
- Broadcast loudness target, with a ±1 LU tolerance
- -23 LUFS
- EBU R 128
How to Add Background Music in Five Steps
The buttons change between editors. The sequence doesn't. If you follow the same five steps every time, you can swap one track for another, replace a line of narration, or shorten a scene without rebuilding the whole mix from scratch.
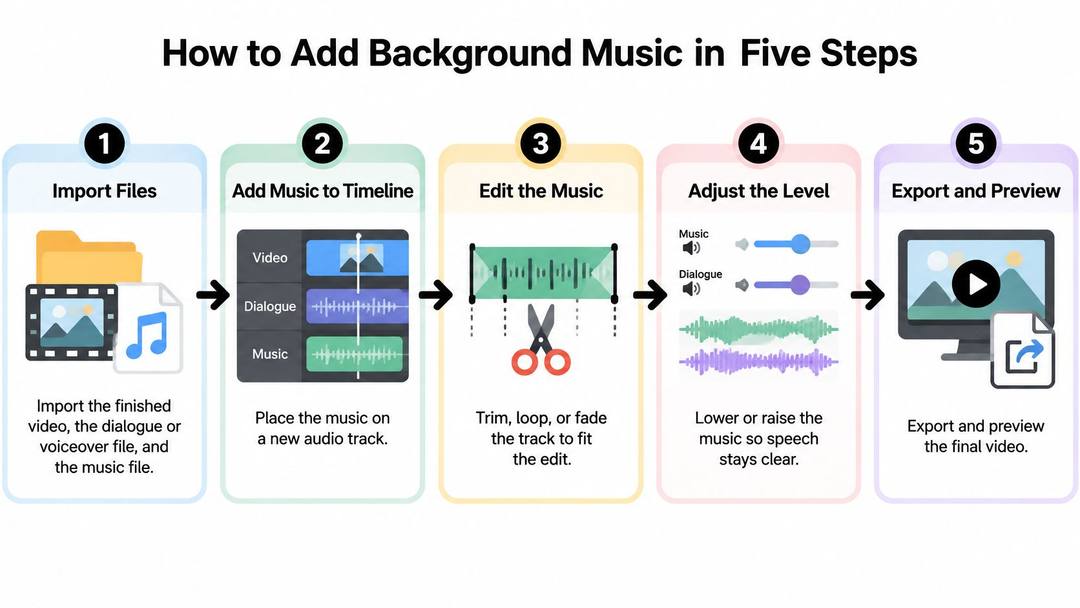
The Sequence That Works in Almost Any Editor
Import everything as separate tracks. Bring in the finished video, the dialogue or voiceover file, and the music file separately. Keeping them apart means you can lower, trim, or replace the music without touching the voice, and you can mute the music track alone to check whether the edit still works without it.
Place the music beneath the dialogue and trim it to the visuals. Put the music on its own audio track below the speech track. Trim it to the length of the picture, not to the natural end of the song, so it finishes with your last cut instead of trailing over a black frame or stopping mid-phrase. If the track is too short, loop it at a musical phrase boundary rather than at an arbitrary second.
Fade every edit, not just the start and end. Add a fade-in at the opening and a fade-out at the end so the track doesn't start or stop abruptly. Then add a short fade of about 0.2 to 0.5 seconds at every music cut or loop point. Most clicks and pops viewers hear aren't recording faults. They're un-faded edits where the waveform jumps.
Lower the music under speech, then raise it in pauses. Use keyframes, clip gain, or automation to pull the music down whenever someone talks. I would start around 15 dB below the voice as a first guess, then adjust by ear phrase by phrase. Setting one level for the whole video is the common slip here. It leaves the music too loud under quiet speech and too thin in the sections with no talking at all.
Preview the export, not just the timeline. Export the file, then play that exported file on phone speakers and headphones. The timeline can sound balanced on studio monitors while the phone version loses the voice entirely. Fix the one spot that feels off, re-export, and check that spot again rather than remixing everything.
What a Finished Mix Sounds Like
You shouldn't have to strain for any word. Speech stays clear at every moment, including the quietest sentence and the line recorded a little farther from the microphone. The music is felt more than heard under narration, then becomes present in pauses, transitions, and montages where it has room.
A good test is simple. If a viewer can repeat your last sentence back to you without rewinding, the music level is probably right. If they remember the tune but not the sentence, it isn't.
There are also no sudden jumps between scenes. The track doesn't leap up because a new clip starts, dip because you forgot a fade, or pump up and down between words. Those small inconsistencies are what make an otherwise good edit sound amateur, and they're all fixable in the timeline before anyone else hears them.
Editor Options for Phone, Desktop and Online Tools
Where to add music on each device
| Device | Typical tool | Where music goes | Level control |
|---|---|---|---|
| Phone | Built-in video app or mobile editor (e.g. CapCut, iMovie) | Audio tab, add from device or in-app library | Volume and fades; ducking varies by app |
| Desktop | Premiere Pro, DaVinci Resolve or Final Cut Pro | Separate audio track in the timeline | Keyframes, clip gain and loudness meters |
| Online editor | Browser tool such as Revid.ai | Audio upload placed on the editing timeline | Volume per clip; check export and licensing terms |
| Screen recorder | Simple recording tool with audio overlay | Single music track over the whole recording | Usually one fixed volume for the full file |
A phone editor is the right choice when you're publishing one short clip quickly and the music only needs a fade and one sensible level. CapCut and iMovie both add music through an audio tab, and that's enough for a montage with little or no speech.
How to Choose Between Them
Choose a desktop editor when speech clarity matters most. Premiere Pro, DaVinci Resolve, and Final Cut Pro give you keyframes, clip gain, and loudness meters on a separate audio track, so you can shape the music around individual phrases instead of guessing. That control is worth the slower setup for interviews, tutorials, and client work.
An online editor suits quick social videos and AI-assisted edits where you don't want to install anything. You upload an audio file into a browser timeline and adjust volume per clip. If you're tracking how browser and collaborative editing tools are changing, you can explore the Editingtools announcement for context on where that category is heading.
I'd avoid a simple screen recorder for anything with narration. One music track at one fixed volume for the whole file can't duck under speech, and that single limitation causes most mixing problems beginners blame on the track itself.
Decision rule: Pick the tool that lets you set volume per clip or per section. If it only offers one level for the entire video, it isn't the right tool for speech.
On any device, the add action follows one pattern. Open the audio tab or audio menu, choose the music file, then trim it to the clip. Desktop and browser editors add one more step, dragging the track beneath the dialogue and setting its gain before you judge the level. Before you commit to any tool, verify two things, whether it exports the track unchanged and whether its music licensing covers your use.
Match the Music to Mood and Pace
Start with the numbers, because they settle an argument creators have constantly. In the study of viral video advertisements, the probability of sharing increased from 9.1% when the music did not fit to 58.7% when it fit, a 6.45-fold difference, with music fit significant at p < 0.001 across four tested brand videos.
Popularity didn't do that work on its own. Popular music without strong contextual fit didn't significantly increase sharing likelihood, with an odds ratio of 1.264 and p = 0.205. When music was both popular and well matched, the relationship became significant, with an odds ratio of 2.549 and p = 0.027. A trending track helps only when it also suits the subject.
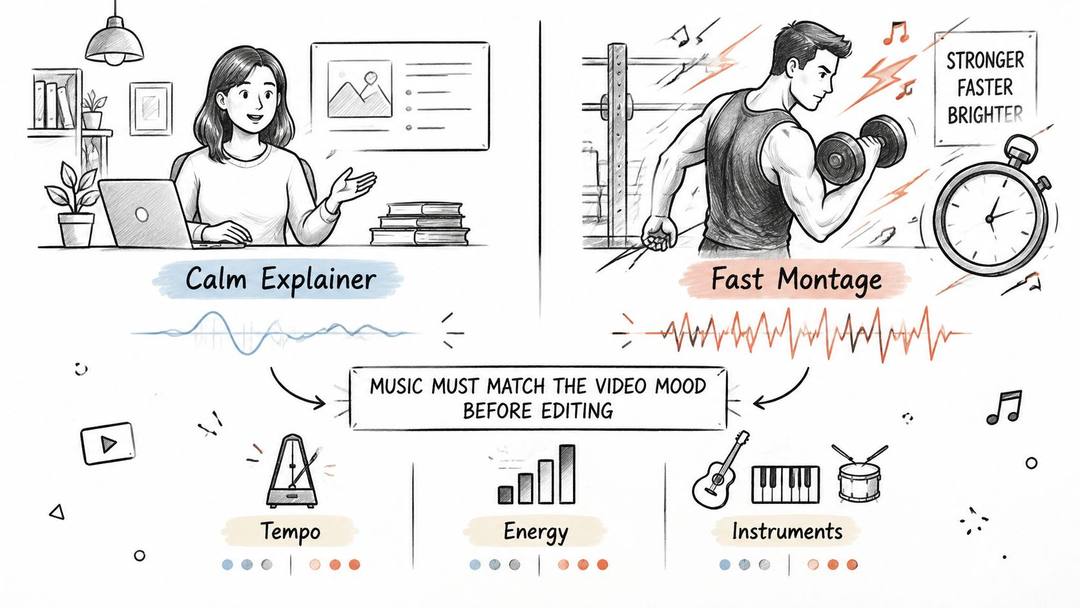
Why Fit Comes Before Editing
A calm product explainer and a fast gym montage need different tempos, energy, and instruments, even if both are sixty seconds long. Piano under a finance tutorial signals care and competence. The same piano under a workout clip reads as a mistake. You're not choosing a song you like. You're choosing what the viewer should feel about what's on screen.
Lyrics deserve special suspicion. A vocal track under a voiceover puts two sets of words in the same frequency range at the same time, and the viewer has to work to separate them. For narration, I'd default to music tracks without vocals and save strong lyrics for intros, outros, and sections with no speech.
Prompt to try
Make a 45-second vertical finance tutorial explaining the 50/30/20 budgeting rule, opening with the hook "Most people budget backwards." Use a calm, clear voiceover, clean stock visuals of notebooks and phone banking apps, bold captions, and soft instrumental piano music with no vocals kept low under the narration.
The index leans toward videos that surface in hashtag and keyword searches, so its view counts run high: compare the groups, not the absolute numbers.
Source: Revid TikTok index: 2,377,477 TikToks with AI labels per video, snapshot of Sep 15, 2026. Median views estimated from view buckets.
Show the data
| Median views | Share past 1M views | |
|---|---|---|
| Angry | 232.4K | 29.8% |
| Sad | 178.1K | 28.6% |
| Humorous | 173.9K | 28.3% |
| Excited | 129.1K | 24.8% |
| Neutral | 116K | 23.3% |
| Happy | 114.2K | 23.8% |
| Informative | 104.4K | 20.6% |
| Inspirational | 88.4K | 20.8% |
A Five Minute Test Before You Commit
- Mute the picture test: Listen to the track alone and name the emotion in one word. Calm, urgent, playful, tense. If that word doesn't match your video's message, stop there.
- Sound off test: Watch the video without audio and describe its pace. Then check whether the track's tempo lines up with the rhythm of your cuts or fights them.
- Compete or support test: Play both together at your planned level. If you notice the music during a key sentence, it's competing, not supporting.
Test one alternative before you lock the edit. Swapping in a second candidate takes minutes at this stage and often reveals that your first choice was merely familiar. Choose for emotion and audience expectation first, popularity second, and your own taste last.
Videos with just a few spoken words (a line or two) beat both silent videos and videos that talk the whole way through, which were the most common and the weakest.
Source: Revid analysis of 176,367 TikToks analyzed by AI, with 1,000+ likes posted between Oct 1, 2025 and Oct 16, 2026 (61,203 creators)
Show the data
| Median views | Share that passed 1M views | |
|---|---|---|
| No speech | 73.3K | 14.3% |
| Under 40 | 122.7K | 20.2% |
| 40 to 120 | 97.2K | 17.6% |
| 120 to 300 | 91.6K | 16.8% |
| 300+ | 67.7K | 11.9% |
Set Levels So Speech Stays Clear
Starting music levels by video type
| Video type | Music under speech | Music in pauses | Watch for |
|---|---|---|---|
| Voiceover tutorial | 12 to 18 dB below speech | Raise to 6 to 10 dB below speech | Bass masking the voice on phone speakers |
| Talking-head interview | 15 to 20 dB below speech | Rise slowly over 1 to 2 seconds | Music pumping between words |
| Product montage, no speech | No ducking needed | Hold steady, set by ear | Sudden volume jumps at scene cuts |
| Captioned ad or sponsored clip | Set by ear, below caption-reading level | Keep under captions | Music competing with caption reading |
Treat those ranges as a first setting, not a rule. They're where you start listening, not where you stop.
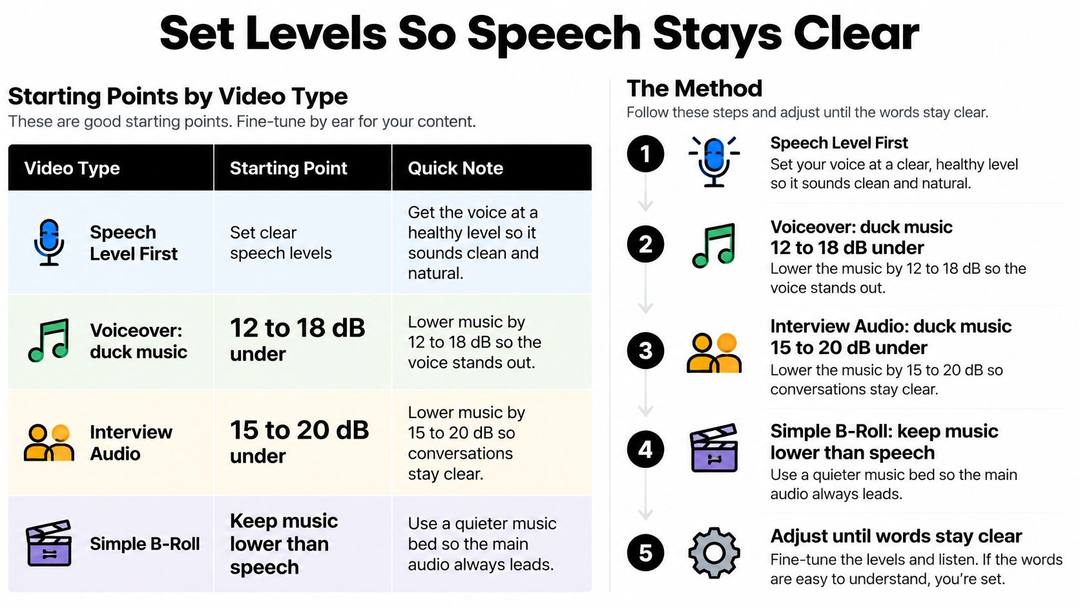
Set Speech First, Then Fit Music Around It
Lock the dialogue level before you touch the music. Play the loudest and quietest spoken lines and get them into a consistent range with clip gain. Only then bring the music up from silence until you can just feel it, and check it against the ranges above.
The common mistake is one fixed music reduction for the whole video. It masks quiet dialogue in one scene and makes an already loud section sound unnecessarily thin in the next. Shape automation around phrases instead. Pull the music down just before speech starts, hold it through the sentence, and let it return with a release of about half a second to a second after the last word. That slower release stops the music pumping between words.
Measure Loudness, Not Just Peaks
Peak meters tell you the highest instant. They don't tell you how loud the video feels. Perceived loudness is measured in LUFS, so monitor with a loudness meter and measure integrated programme loudness and true peak after all ducking, fades, compression, and limiting are in place.
For a technically controlled master, EBU R 128 specifies −23 LUFS as a broadcast production target and permits a ±1 LU tolerance when exact matching is impractical. Most social videos won't be delivered to broadcast, but the discipline transfers. A measured master behaves predictably when a platform processes it.
Finish with the check most creators skip. Play the final encoded file on phone speakers and headphones, because codecs and platform processing can alter peaks and apparent balance after export. Excessive low bass can disappear on small speakers, while dense limiting can make speech fatiguing even when the meter looks fine. If the voice survives a phone speaker at half volume in a noisy room, your levels are doing their job.
Clear the Rights Before You Publish
A track can sound right in the edit and still make the finished video unusable on one of its destinations. Before choosing music, decide where the video will appear, whether it promotes a business, and whether it will run as a paid ad. Rights depend on those details, not just on whether the song is available in an app.
YouTube's Content ID guide explains that uploads are automatically scanned against reference files supplied by copyright owners. A match may lead to monetization by the rights holder, tracking, regional blocking, or a claim. A claim can arise even when you did not intend to infringe, so checking permissions before editing is more reliable than trying to resolve a dispute afterward.
Use this checklist to match the source and license to the way you plan to publish.
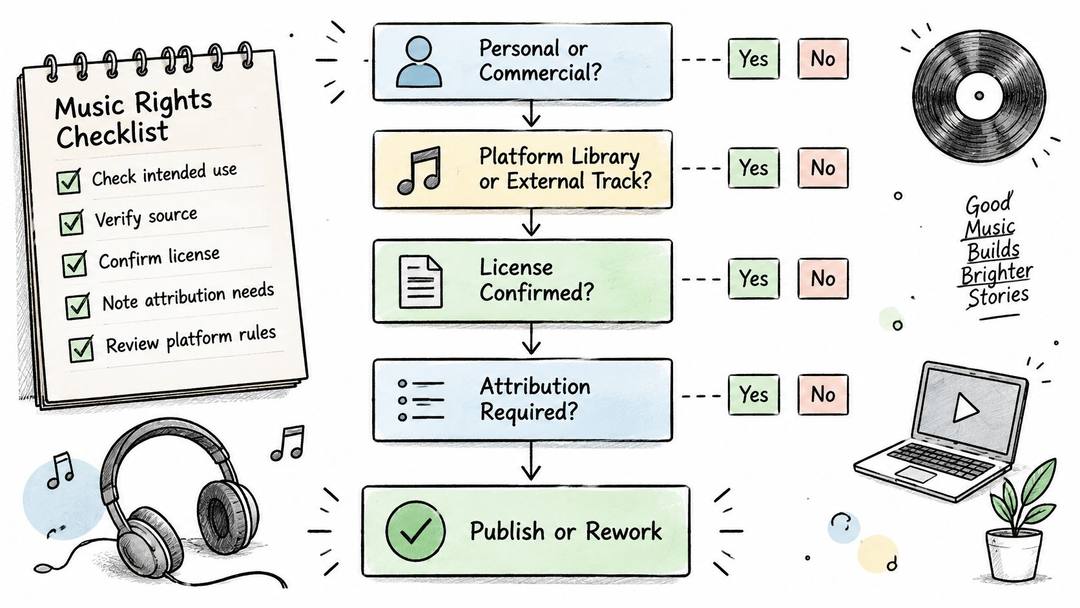
License checks by use case
| Use case | Music source | What to verify |
|---|---|---|
| Personal post on one platform | Platform's built-in library | Permission for that platform and whether it applies outside the app |
| Business or client work | Royalty-free or paid stock track | Commercial-use terms, permitted platforms, and territory |
| Paid ad or sponsored clip | Track licensed for advertising | Whether ads are allowed, plus duration and monetization terms |
| Cross-posting the same file | Exported video | Rights for every destination, not only the first platform |
Four Questions in Order
First, is the video personal or commercial? Next, is the track from a platform library or an outside file? Will distribution be organic or paid, and will you publish on one platform or several? Answering these questions before editing narrows down which license fits. A track cleared for a personal post may not cover a sponsored clip, even if the video edit is identical.
Check the platform permission carefully. In-app music may be licensed only for that platform, region, account type, or use case. Downloading the video and reposting the same file elsewhere can therefore lead to a mute or a claim. Royalty-free describes a licensing model, not blanket permission for every use. Confirm that the license covers commercial work, client projects, and social advertising where relevant.
Music rights also involve more than the recording. The U.S. Copyright Office educational material on music income explains that pairing music with moving images generally requires permission for both the composition, through a synchronization license, and the specific recording, through a master-use license. Owning a copy or streaming a song does not grant those permissions.
A short walkthrough can help you recognize how claims appear, but it does not replace checking the terms for your track and intended use.
If you need a source for a project, use this guide to where to find copyright free music for your videos, then check each track's actual license against your use case. For worldwide distribution, obtain worldwide digital-video rights or restrict the video's distribution to the territories covered.
Keep a License Record for Every Track
Save the license details when you choose the track. A simple record should include:
- Source and rights holder: Where the track came from and who controls it.
- License type and platforms: What permission you obtained and where it applies.
- Territory, duration, and account type: Where and how long you can use it, and which account types are covered.
- Ad permission and attribution: Whether paid use is allowed and whether credit is required.
- Proof of purchase or permission: The file or correspondence to provide if a claim arrives.
Keep the record with the exported video or project files. If a claim appears later, you can check the applicable terms and present proof without having to reconstruct where the music came from.
Fix the Mix Problems Viewers Notice
The complaint you'll hear most is that the voice disappears on a phone. It usually isn't a volume problem. The music's bass and low-mids sit in the same range as speech, so the track can be technically quiet and still mask every word.
Music mix symptoms, causes and fixes
| Symptom | Likely cause | Fix |
|---|---|---|
| Voice hard to hear on phones | Music bass or low-mids overlap speech | High-pass the music around 80 to 120 Hz and duck under the voice |
| Music pumps between words | Release after speech is too fast | Lengthen the release to half a second or more |
| Music jumps in volume at one scene | Clip gain not matched between clips | Match clip gain and re-measure the export |
| Music disappears on small speakers | Too much low bass | Reduce bass and check on phone speakers |
Start with a high-pass filter around 80 to 120 Hz on the music track. It removes low energy that small speakers can't reproduce anyway and clears space for the voice without making the track sound thin on headphones. Then duck normally. Those two moves together fix most phone complaints.
Pumping has a different cause. If the music surges up in every gap between words, your release is too fast. Lengthen it to half a second or more so the track returns during real pauses, not between syllables. A sudden jump at one scene is simpler still. Match the clip gain between the two music clips, add a short crossfade, and re-measure.
The Sound Off Review
Accessibility isn't separate from mixing. The National Deaf Center guidance on captioned media notes that captions should represent spoken words and important sounds, and specifically that captions help when background music or distracting noise makes speech difficult to understand.
So watch your export once with the sound completely off. The core message should survive through captions, on-screen text, and visual pacing alone. Caption meaningful audio cues as well as dialogue, and check that captions don't have to compete with a busy track for the viewer's attention.
If the video only works at full volume on good headphones, it doesn't work for most of the people who'll actually watch it.
Separate your fixes by cost. Fades, clip gain, high-pass filtering, and release times take a minute in the timeline. A track whose tempo, lyrics, or frequency range fights the narration needs replacing, and no amount of ducking will rescue it. Knowing which problem you have saves an afternoon.
Run the Final Checks Before You Publish
Run the same five checks before every upload, in this order. They take about ten minutes and they catch the failures that cost you a re-upload.
- Fit: Run the mute-the-picture test once more and confirm the track's emotion matches the subject and pace.
- Sound off: Watch muted and confirm the message survives through captions, on-screen text, and pacing.
- Levels: Confirm speech was set first, check your ducking against the starting ranges, and listen on phone speakers and headphones.
- Rights: Open the license record and verify every platform you're cross-posting to, including territory, duration, and ad permission.
- Encoded export: Re-measure the exported file itself, not the project, since platform processing changes the balance.
Fix Only the Check That Fails
Publish when all five pass. When one fails, fix that one thing. A rights failure means swapping the track and keeping your cue points and automation, after verifying the replacement has a compatible tempo, structure, and license scope. A levels failure means adjusting one phrase, not remixing the video.
In our timeline editor, you can change a line, swap a scene, restyle captions, or regenerate one shot without starting over, and export in 720p, 1080p or 4K. To make a music video, you upload an MP3 or WAV or paste a Suno link, choose a visual style, and Revid generates scenes cut to the beat, with optional synced lyrics. New video exports require an active plan, so run these checks before you spend an export on a mix you haven't heard on a phone.
The editor view below shows where that per-clip adjustment happens before export.
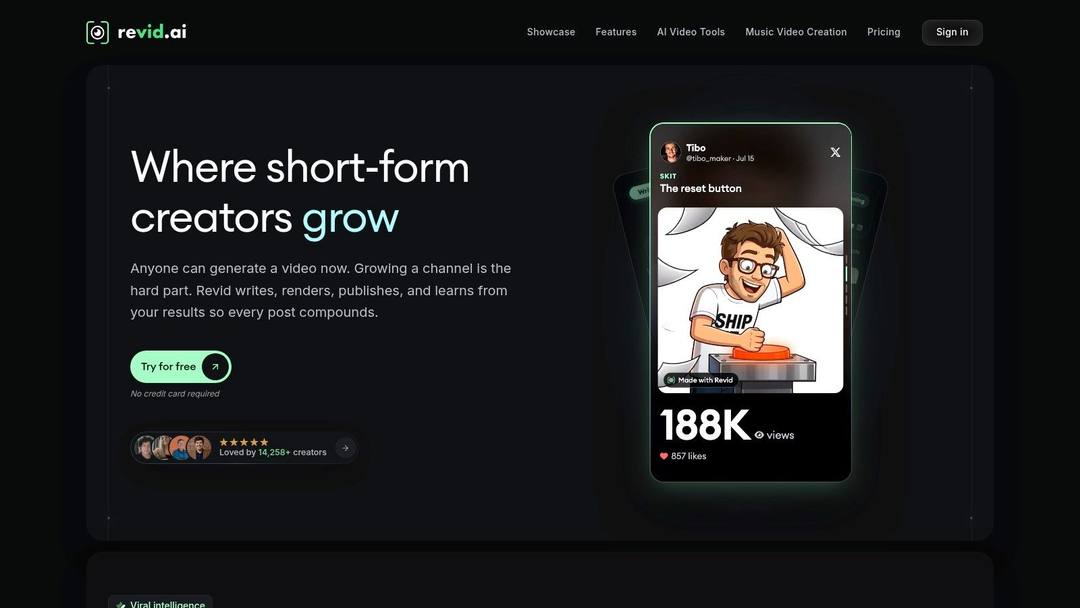
Take your next video, run the five checks above, and fix the music at the level of fit, clarity, and rights instead of just nudging a volume slider. With Revid, you can upload your own track, fine-tune the mix per clip in the timeline editor, and replace a single scene or line without rebuilding the whole video. Start your next edit at revid.ai and publish a version that still sounds right on a phone speaker.
FAQ
How loud should background music be under a voiceover?
A good first guess is about 15 dB below the voice, then adjust by ear phrase by phrase. For voiceover tutorials start around 12 to 18 dB below speech, and for interviews around 15 to 20 dB. Raise the music in pauses rather than using one level for the whole video.
Does using a trending song make a video get shared more?
Not on its own. In a study of viral video ads, popular music without contextual fit did not significantly increase sharing, while music that fit raised sharing probability from 9.1% to 58.7%. A trending track helps only when it also suits the subject.
Why does my voice disappear on phone speakers?
It is usually not a volume problem. The music's bass and low-mids overlap the speech range and mask the words. Apply a high-pass filter around 80 to 120 Hz on the music and duck it under the voice.
How do I stop background music from pumping between words?
Pumping happens when the release after speech is too fast. Lengthen the release to about half a second or more so the music returns during real pauses, not between syllables.
What licenses do I need to put music in a video?
Pairing music with moving images generally needs permission for both the composition, through a synchronization license, and the specific recording, through a master-use license. Owning or streaming a song does not grant those rights. In-app music may also be licensed only for that platform, so check rights for every place you post.
Sources
- Revid TikTok index: 2,377,477 TikToks with AI labels per video, snapshot of Sep 15, 2026. Median views estimated from view buckets.
- Revid analysis of 176,367 TikToks analyzed by AI, with 1,000+ likes posted between Oct 1, 2025 and Oct 16, 2026 (61,203 creators)
Charts and figures checked on November 9, 2026.